Creating an effective lead magnet is essential for any marketer looking to grow their email list and engage with potential customers. If you're wondering how to add a lead magnet to GetResponse, you've come to the right place! In this comprehensive guide, I’ll walk you through the steps to seamlessly integrate lead magnets into your GetResponse account, ensuring you can capture leads effectively and boost your marketing efforts. By the end of this article, you'll be equipped with practical knowledge and actionable tips to enhance your email marketing strategy.
What is a Lead Magnet?
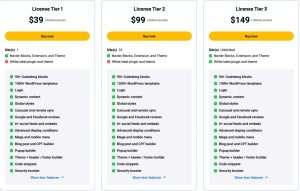
Before we dive into the nitty-gritty of adding a lead magnet to GetResponse, let’s clarify what a lead magnet is. A lead magnet is an incentive offered to potential customers in exchange for their contact information, usually an email address. This could be anything from an eBook, a checklist, a free trial, or a discount code. The goal is to provide value that encourages prospects to share their information with you.

Source: www.getresponse.com
Why Use a Lead Magnet?
Lead magnets serve multiple purposes. They not only help you build your email list but also allow you to establish trust and authority in your niche. Here are a few compelling reasons to incorporate lead magnets into your marketing strategy:
Increased Conversion Rates: Lead magnets can significantly increase your conversion rates. According to a study by HubSpot, businesses that use lead magnets can see conversion rates as high as 50% or more.
Targeted Audience: By offering a lead magnet that resonates with your target audience, you can attract individuals who are genuinely interested in your products or services.
Nurturing Relationships: Lead magnets help you initiate a relationship with your audience. Once you have their email addresses, you can send them valuable content and offers, nurturing them toward making a purchase.
Segmentation Opportunities: You can segment your audience based on the lead magnets they opt-in for, enabling you to tailor your marketing messages more effectively.
How to Create a Lead Magnet
Creating a lead magnet involves several key steps:
Identify Your Audience’s Needs: Conduct surveys or research to understand what your audience is looking for. This will help you create a lead magnet that addresses their pain points.
Choose the Format: Decide on the format of your lead magnet. This could be a PDF guide, a video series, a webinar, or even a discount code.
Create Compelling Content: Ensure that your lead magnet provides real value. It should be informative, actionable, and visually appealing.
Design an Attractive Landing Page: Your landing page should be optimized for conversions. It should clearly explain the benefits of your lead magnet and include a simple opt-in form.
Promote Your Lead Magnet: Share your lead magnet on social media, your website, and through other marketing channels to attract potential leads.

Source: www.getresponse.com
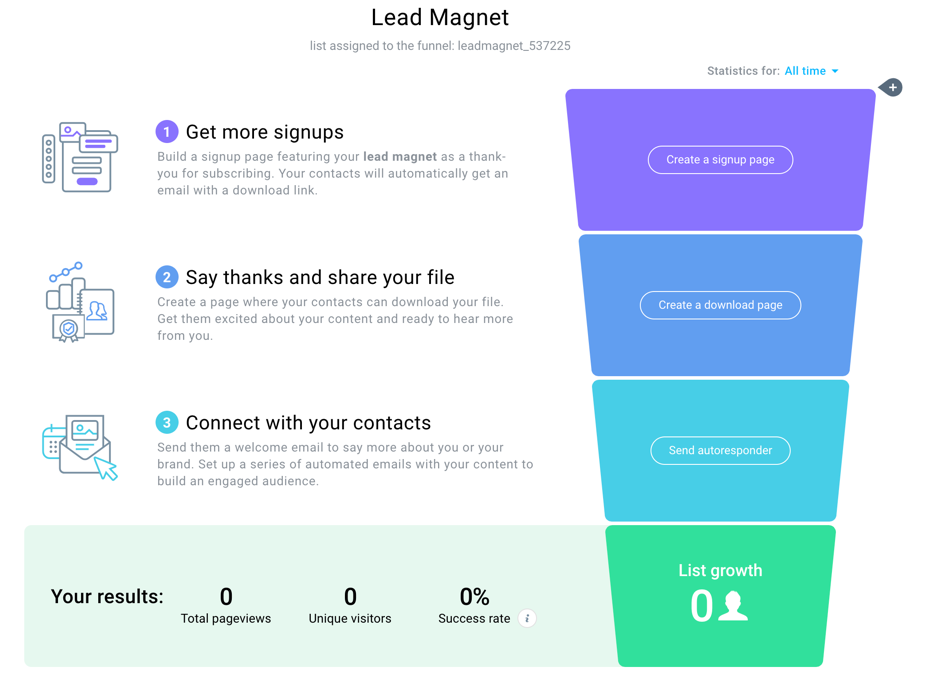
Step-by-Step Guide to Adding a Lead Magnet to GetResponse
Now that we understand the importance of a lead magnet, let’s get into the specifics of how to add one to GetResponse. Follow these steps carefully:
Step 1: Log into Your GetResponse Account
First, log into your GetResponse account. If you don’t have an account yet, you can easily sign up for one on their website.
Step 2: Create a New List
- Navigate to the "Contacts" section in the left-hand menu.
- Click on "Lists."
- Select "Create List" and fill in the necessary details, such as the list name and description. This list will be used to store the contacts that sign up for your lead magnet.
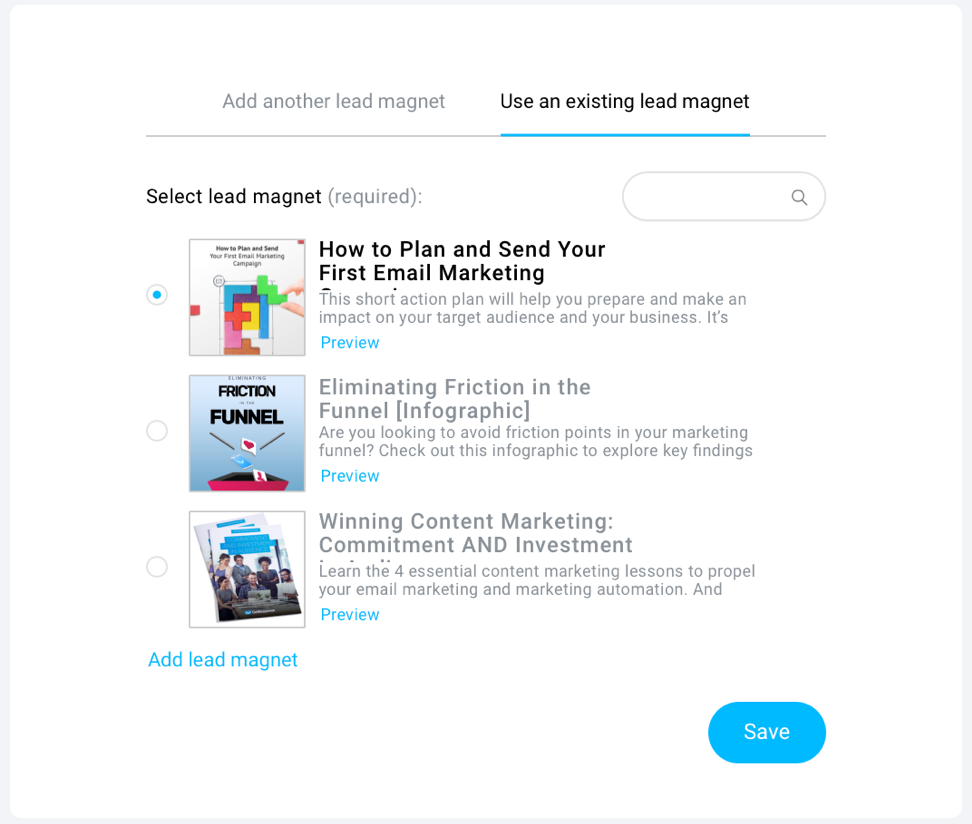
Step 3: Design Your Lead Magnet
- Create your lead magnet (e.g., an eBook, checklist, etc.). Ensure it’s high-quality and valuable.
- Save the lead magnet file on your computer or cloud storage.
Step 4: Set Up a Landing Page
- Go to the "Landing Pages" section in your GetResponse dashboard.
- Click on "Create Landing Page."
- Choose a template that suits your brand and the type of lead magnet you’re offering.
Step 5: Customize Your Landing Page
- Use the drag-and-drop editor to customize your landing page. Add a headline, subheadline, and description that clearly explain the value of your lead magnet.
- Include an opt-in form where visitors can enter their email addresses.
- Make sure to add a strong call-to-action (CTA) that encourages visitors to download the lead magnet.
Step 6: Upload Your Lead Magnet
- After customizing your landing page, return to the "Files" section in GetResponse.
- Click on "Upload Files" and upload your lead magnet file.
- Once uploaded, copy the link to the file.
Step 7: Link the Lead Magnet to Your Landing Page
- Go back to your landing page editor.
- In the opt-in form settings, set up the confirmation message or redirect URL to the link of your lead magnet file. This way, once users submit their email addresses, they will receive the lead magnet via email or be redirected to the download link.
Step 8: Publish Your Landing Page
- Once you’re satisfied with your landing page, click on "Publish."
- GetResponse will provide you with a URL for your landing page. Share this link across your marketing channels to start attracting leads.
Source: www.getresponse.com
Best Practices for Using Lead Magnets
To maximize the effectiveness of your lead magnets, consider the following best practices:
1. Test Different Formats
Experiment with various lead magnet formats to see which resonates best with your audience. A/B testing can help you determine what works.
2. Keep It Simple
Your lead magnet should be easy to understand and consume. Avoid overwhelming your audience with too much information.
3. Promote Across Multiple Channels
Don’t limit your promotion to just one platform. Share your lead magnet on social media, your website, and through email campaigns.
4. Follow Up
After someone downloads your lead magnet, send a follow-up email thanking them and providing additional valuable content. This helps nurture the relationship.
5. Monitor Performance
Use GetResponse analytics to track the performance of your lead magnet. Monitor metrics like conversion rates and engagement levels to optimize your strategy.

Source: www.getresponse.com
Frequently Asked Questions About Adding Lead Magnets to GetResponse
What types of lead magnets work best?
Lead magnets can vary widely, but some of the most effective types include eBooks, checklists, templates, webinars, and discount codes. The key is to offer something that provides real value to your audience.
Can I use multiple lead magnets?
Absolutely! Using multiple lead magnets can help you attract different segments of your audience. Just ensure each lead magnet is relevant to the specific audience you’re targeting.
How do I track the performance of my lead magnets?
GetResponse provides analytics tools that allow you to track the performance of your landing pages and email campaigns. You can monitor metrics like open rates, click-through rates, and conversions.
Is it necessary to have a landing page for my lead magnet?
While it's not strictly necessary, having a dedicated landing page for your lead magnet can significantly improve your conversion rates. It allows you to present your offer clearly and effectively.
How can I improve my lead magnet conversion rates?
To improve conversion rates, ensure your lead magnet is highly relevant to your audience, promote it effectively, and optimize your landing page for usability and clarity.
Source: www.getresponse.com
Conclusion
Adding a lead magnet to GetResponse is a straightforward process that can significantly enhance your email marketing strategy. By providing valuable incentives to your audience, you can build your email list, nurture relationships, and ultimately drive sales. Remember to create high-quality lead magnets, promote them effectively, and monitor their performance to ensure success.
Now that you have the knowledge to add lead magnets to GetResponse, I encourage you to take action! Start creating your lead magnet today, and watch your email list grow. If you have any questions or want to share your experiences, feel free to leave a comment below!
Watch This Video on How to add lead magnet to getresponse